The World After VEX

VEX Robotics posted this on it's Omni-Directional Wheels web page: "New for the 2019 FTC / FRC season, we've redesigned the 4” Omni-Directional Wheel to have a similar construction style to our 3.25” Omni-Directional Wheel. We decreased the number of rollers, to reinforce the body and improve the strength during sideways impacts. Don’t worry, it’s only a little wider than the current 4” Omni-Directional Wheel, and should still fit anywhere you were currently using a 4” wheel before". [emphasis mine].  Well, that's not quite true!!! The V1 Omni Wheel was 1.344 wide or 2.688 for the pair (not allowing for the spacer between them) while the V2 Omni Wheel is 1.53 wide or 3.06 for the pair (also not allowing for the spacer between them) and will be an impossibly tight fit in the 3.1 space of the SAK Center foot. [follow the links above for copies of the original VEX drawings]. There are several options. First, if you like the V2 version of the VEX Omni Wheel, you can use just a single wheel set front & back. You'll need to revise the spacers on the bolt/axle to center the single wheel in the SAK mounting. It won't provide the same stability or smoothness that a 4 wheel center foot would have. The other alternative is to find another Omni Wheel supplier. What follows is the list of suppliers that I've researched. If you just want to see the "solution" jump here.

The Search Begins: I've considered Omni Wheels from every supplier I could find. If you know of one that's not on the alphabetical list below please let me know. In the list that follows I've provided links to the vendor's part page and, if available, links to .pdf data sheets for the parts.

AndyMark
dura omni am-34307  see: https://www.andymark.com/products/4-in-duraomni-wheel
- rejected - 2in wide from hub-to-hub - OK for use as a single omni but two won't fit without modification.

Generation Robots -
100mm-double-nylon-rubber-omniwheel -
https://www.generationrobots.com/en/402785-100mm-double-nylon-rubber-omniwheel-with-bearing-rollers.html
- rejected - Nexus Robot Omni Wheel reseller - source for on-line datasheets!

Nexus Robot -
100mm-double-plastic-omni-wheel-wbearing -
http://www.nexusrobot.com/product/100mm-double-plastic-omni-wheel-wbearing-14058.html
- rejected - according to data sheet, double wheels are 39.4 mm wide (1.55 in) - too wide!

OmniTrack - https://www.omnitrack.us/wheels-castors/omniwheels
- rejected - nothing the correct size (4 in)

Pitsco Education - https://www.pitsco.com/TETRIX-Omni-Wheel-Packs
TETRIX® MAX 4in Omni Wheel Packs -  uses 8mm (.318) OD bushing would have to bore out for .875 bearing
only 3D model available, hard to estimate actual wheel width, estimated to be more difficult to utilize than ServoCity Wheels

rapid.on.line (UK)  -
https://www.rapidonline.com/70-3011
- rejected - VEX reseller

Robot Mesh - https://store.robotmesh.com/vex-robotics/wheels/vex-4inch-omni-wheels
- rejected - selling sq shaft version of Vex wheel

Robot Shop - https://www.robotshop.com
resells Servo City wheel - see ServoCity below for data links

the robot space - https://www.therobotspace.com
- rejected - VEX reseller

ServoCity / RobotZone / Actobotics - https://www.servocity.com/4-omni-wheel
Designed to mount to a live shaft, no bearing holder that fits existing bolt pattern. will be necessary to bore out center hole
from existing .5 in to .875 in to accommodate depth of bearing.- Prototype under development - see below.


SuperDroid Robots
- see: https://www.superdroidrobots.com
- rejected - Nexus Robot Omni Wheel reseller

The VEX Alternative

I'm currently working on a design that will use a ServoCity 4in Omni Wheel. However, their wheel is designed to mount to a live shaft and I've been unable to find an off-the-shelf bearing mount that will mate with the hole pattern that ServoCity uses. ServoCity has confirmed that they do not have one. I have design a CNC bearing mount and, while I'm at it, a set of spacers to go between the wheels.


Important Note for Customers who have purchased the SAK Center Foot from me. I will supply you, at no charge, the bearing mount parts you need to use the ServoCity Omni Wheels in the SAK Center Foot.


This is a pair of the ServoCity Omni Wheels.
the image links to a 3d .pdf file so you can see the other side.
It's been modified - the 1/2 inch center bore has been expanded to 7/8 inch to accept the balance of the bearing.
Flat head 6/32 screws hold the bearing mounts in place.
(Use Nylon Locking nuts on the other side.)
The details of the modifications follow.

This is 8 of the modified wheels mounted in the VEX wheel holder of the SAK center foot.
The flat head screws go towards the center with a 1/16 inch space between them. Spacers (washers) on the outside are used to center the wheels in the wheel holder [spacers not shown].


Modifying the Servo City Omni Wheel

Left:  
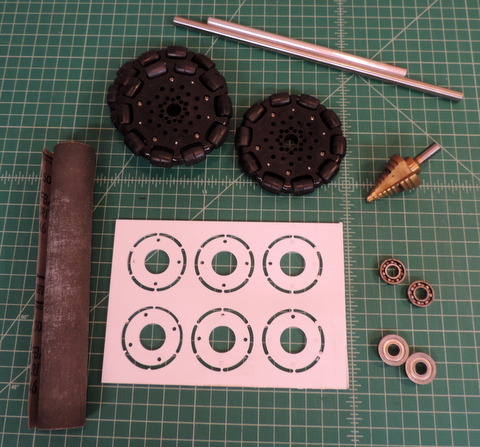
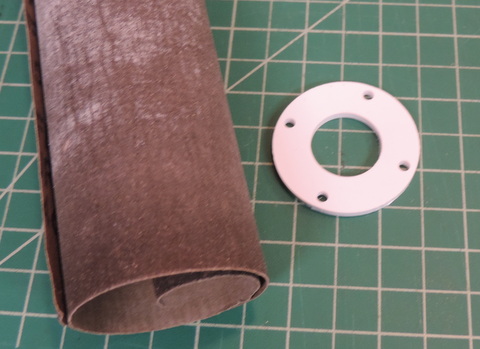
The assortment of parts we're starting with. The CNC panel of bearing mounts is version 1 and will be updated. (It's parts for only 4 wheels, Version 2 will have twice as many parts.)
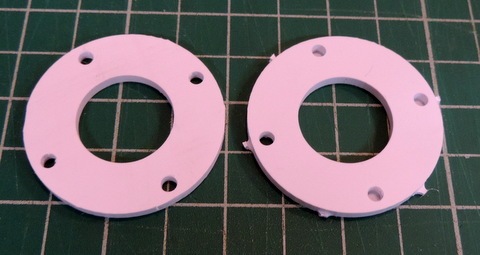
Above: remove the parts from the panel & trim off the tabs. Not shown in this version, one spacer of each set of 3 will have countersunk holes, another one will have a recess for the hex nut. The third one is used as a spacer between the two wheels.
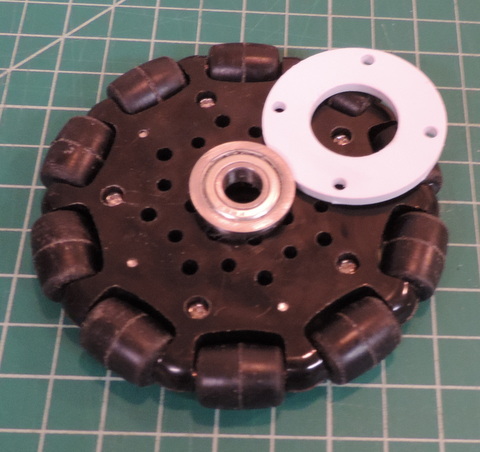
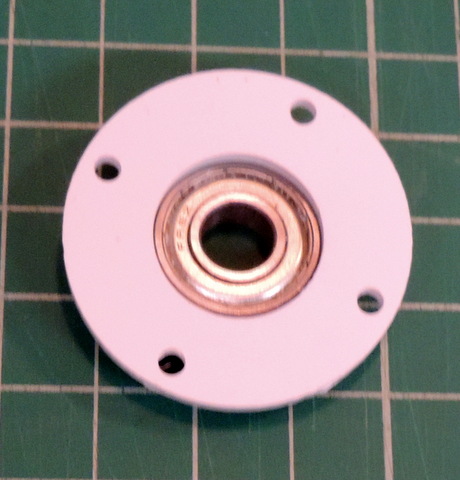
Left:  The bearing , most likely, will not fit in the bearing mount. It's intended to be a tight fit.
Below: To enlarge the hole roll a sheet of fine sandpaper with the grit out.
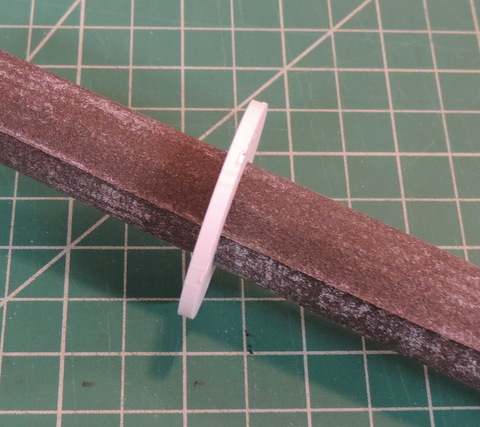
Left:  Slide the roll into the bearing mount and let it unroll. Then slide it back and forth a few times - check the fit. It won't take much sanding. Don't over do it!
Below: Bearings in the bearing mounts
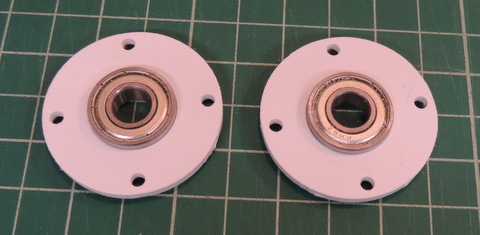
In order for the bearing to fit you have to enlarge the center bore of the Servo City Wheels from 1/2 in to 7/8 in. The easiest way to do that is with a Step Drill. I got mine from Amazon (see parts list ) You only have to enlarge to a depth of 1/8 inch. I've marked my drill with a marker so I know where to stop.
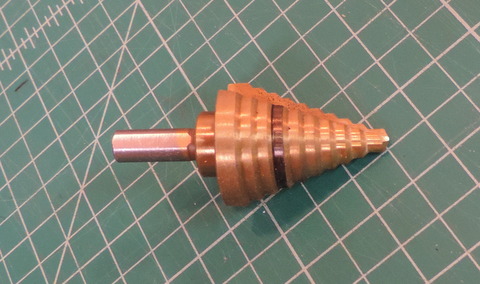
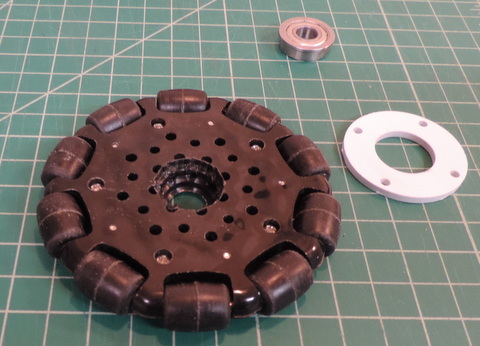
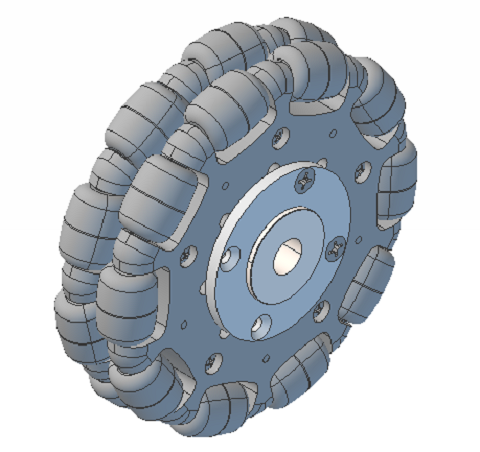
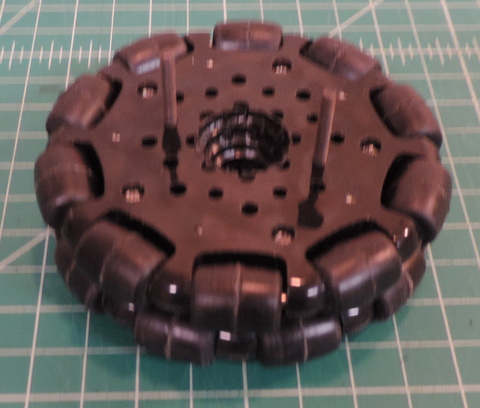
Wheel after bore is enlarged.
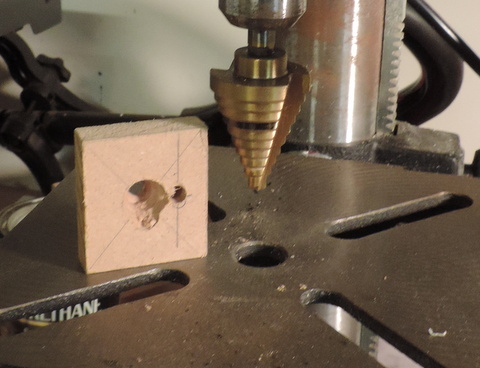
Above: I put a block of wood under the wheel because the Step Drill extends through the wheel body. (yes, I've drilled into the table of my drill press. avoid that if you can - it dulls the drill bits!)
Right: The swarf will obscure your progress - Turn off the Drill, wait for it to stop spinning,  and clean it off! Then continue...

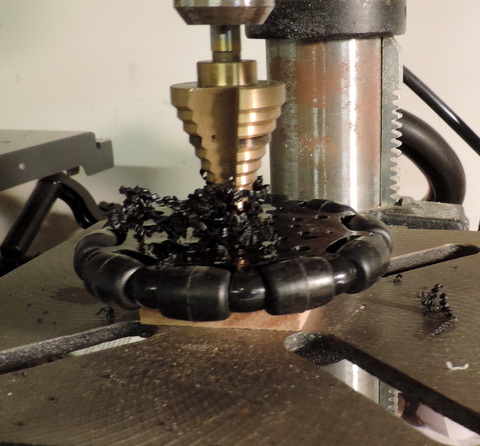
Bring one of the bearing mounts with you when you are drilling so you can check the depth of the bore.
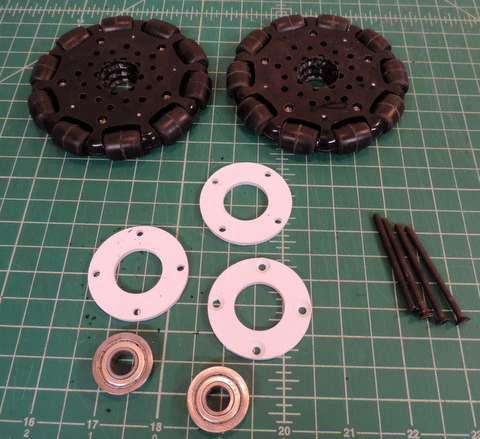
We're ready to begin assembly. They are hard to see, but I added countersinks to the holes in one of the mounts. The shop didn't do them in Version 1.

Use the screws to align the holes in the bearing mount with the holes in the wheel. (there are 10 holes in the wheel.). Don't bother doing the 2nd wheel, the bearing mount will pop out while you align the first wheel with the second one. Note: the screws shown here are actually too long. You'll have a choice of using 1.5 in screws or 3.0 in screws. (more later)

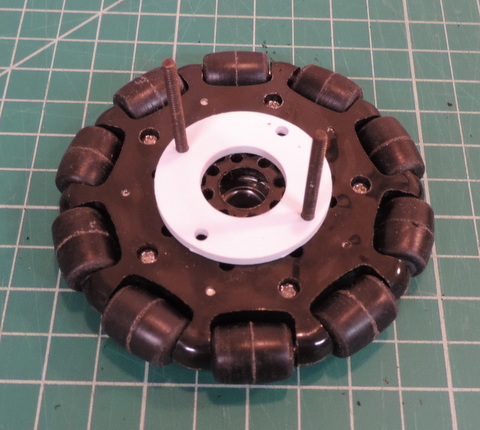
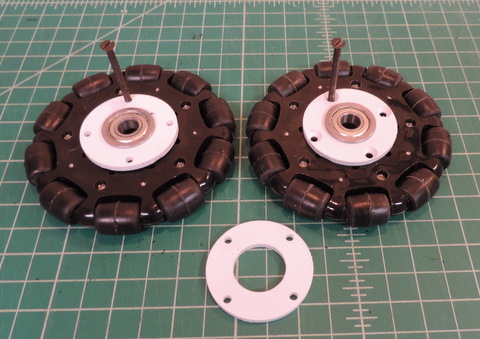
Turn the first wheel over and  slide the space (3rd bearing mount) on over the screws.

Align the second wheel so that' it's Omni Bearing are centered between the ones of the first wheel.
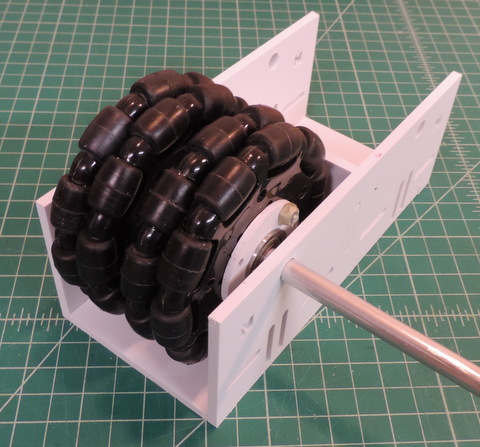
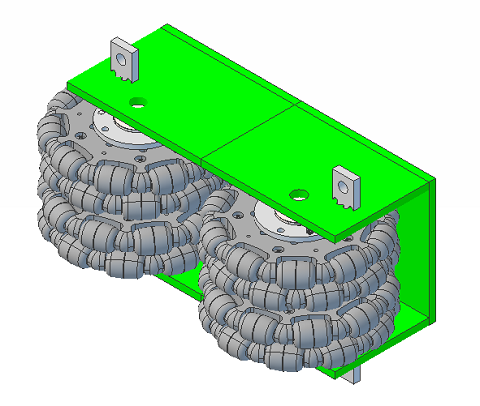
Modify and Assemble a second set of wheels (Actually 3 more sets!) Install on your axle with the flat head screws in the center.
More to come: Version 2 of the Bearing Mount panel will have a set of 3 spacer rings to be used  between the two sets of omni wheels and on either side of the pair of wheels. As mentioned above one bearing mount will have CNC cut countersinks for the flat head screws, the other one will have a hex recess for the Nylon Lock Nuts. I'll also be experimenting with using 3 in screws so you can lock all 4 wheels into alignment if you want to. For right now we at least have a workable alternative.

Click Here for the Parts List


Home